Handling Flutter Internationalization like a Pro

This is Part #7 of the series in Flutter Production Level Development where I teach you all the tips and tricks used in an Industry Level Production app.
When building a global production-ready app that will possibly be used by millions, one of the most important features is internationalization.
What is internationalization you ask?
Internationalization is the process of designing a software application so that it can be adapted to various languages and regions without engineering changes.
It basically means adding multiple languages support to your app to make it more accessible to users around the world.
In this article, we will be taking the easiest route to adding and handling language support to your app and get it running in few seconds with the help of slang package.
- Add the slang & slang_flutter package in your pubspec.yaml file.
name: skeleton_app
description: "A new Flutter project."
publish_to: 'none'
version: 1.0.0+1

environment:
  sdk: '>=3.2.2 <4.0.0'

dependencies:
  flutter:
    sdk: flutter
  cupertino_icons: ^1.0.2
#TODO1: Add these two packages
  slang: ^3.29.0
  slang_flutter: ^3.29.0
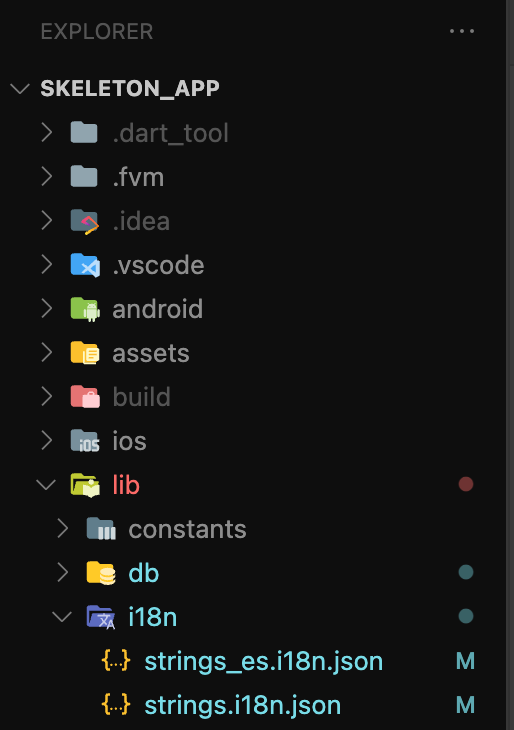
2. Create a folder named i18n in the lib folder of your project. Inside the folder create the files for the languages that you want with the name strings_(languageCode).i18n.json. For eg if you want Spanish language which has the language code of es. The file name will be strings_es.i18n.json. For English you can just name it strings.i18n.json
You can find the language code for other languages here.

3. Open the strings.i18n.json file and start adding the texts used in your app.
strings.i18n.json
{
    "language": "English",
    "hello": "Hello"
}
Make sure that there should always be same and equal key in all the files. If you miss any, it will throw an error. So while adding make sure you add it in the other file as well.
For eg if you add {“hello” : “Hello”} in strings.i18n.json, you must add {“hello” : “Hola”} in strings_es.i18n.json as well. [“hello” key being the important factor]
strings_es.i18n.json
{
    "language": "Espanol",
    "hello": "Hola"
}
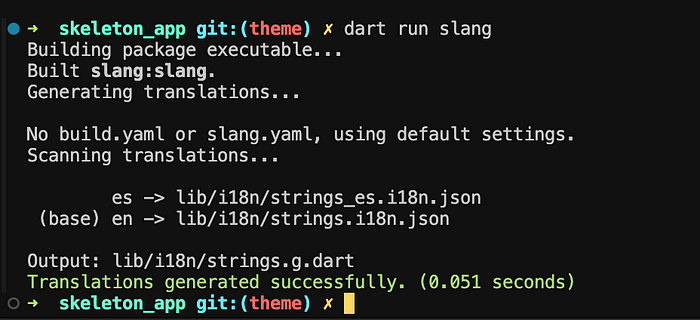
4. After adding the texts make sure to save the file and then run the command in the terminal for the changes to take place, it will generate astrings.g.dart file for you.
dart run slang
5. Instead of using String in your widgets just replace it with t.hello . Import the generated files if you get an error.
import 'package:skeleton_app/i18n/strings.g.dart';

//Instead of this
Text('Hello'),

//Use this
Text(t.hello),
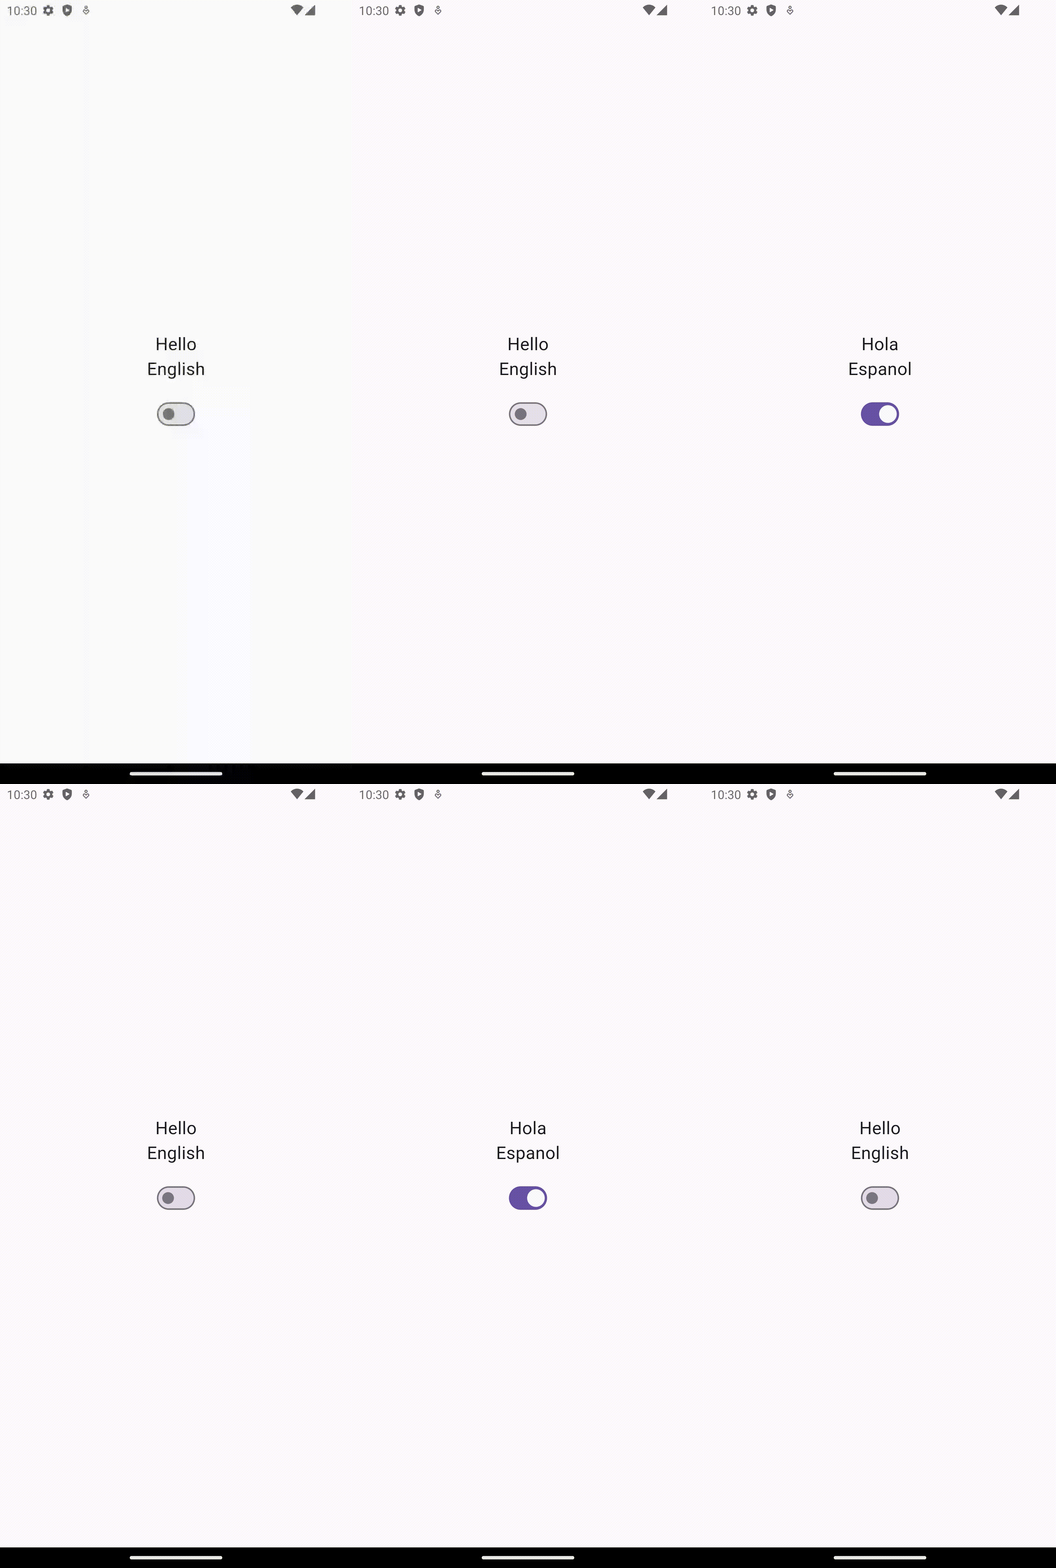
Here is an eg showing the language change using a Switch Widget
import 'package:flutter/material.dart';
import 'package:skeleton_app/i18n/strings.g.dart';

class LanguagePage extends StatelessWidget {
  const LanguagePage({super.key});

  @override
  Widget build(BuildContext context) {
    return Scaffold(
      body: Center(
        child: Column(
          mainAxisAlignment: MainAxisAlignment.center,
          children: <Widget>[
            Text(
              t.hello,
              style: const TextStyle(fontSize: 24.0),
            ),
            Text(
              t.language,
              style: const TextStyle(fontSize: 24.0),
            ),
            const SizedBox(height: 20.0),
            Switch(
              value: TranslationProvider.of(context).locale == AppLocale.es,
              onChanged: (languageSwitched) {
                final newLocale =
                    languageSwitched ? AppLocale.es : AppLocale.en;
                LocaleSettings.setLocale(newLocale);
              },
            ),
          ],
        ),
      ),
    );
  }
}
6. You can also add dynamic Strings in slang package. If you have a String where the value can be dynamic, then use ${value}.
For eg if the String needs to be You earned 10 points where the 10 can be any number then write the key value pair as "you_earned_points":"You earned ${value} points" in i18n.json file and in Flutter you will write -
//Replace the '10' with the data coming from the API
Text(t.you_earned_points(value: '10'))
Advantages of using this way -
- Any error is caught by the IDE and is easy to fix.
- Debugging becomes a breeze since all the Strings are in one file and fixing any spelling mistakes or changing any String variable is very easy.
- Bugfixes require a single commit as all the Strings are available in a single file, thus reducing the chances of merge conflicts.
- More languages can be added later by simply creating files with the language code making the code future-proof.
So this is how simple it is to use language translation in Flutter using slang. Even if you are not going to have translations in the app, it is considered best practise to keep all your text Strings in one file as mentioned in Part #2 and after working on some big apps I have come to the conclusion that this is a better method to follow instead of what I taught in Part #2. So I suggest to follow this method from now on instead of Part #2.
I hope you liked the article. I plan to bring more short articles like these to teach tips and tricks used in Production Level Flutter Development!
You can read about Handling Flutter imports like a Pro in Part #1 of the series.
You can follow me on Twitter, Github, or Linkedin to stay updated with all my new articles and tips.
